DIY temperature sensor for 4-button RC battery chargers
Most 4-button chargers on the market appear to have a connector for a temperature probe. Unfortunately almost none of the chargers come with the sensor in the box, and even aftermarket availability of temperature probes is non-existent. With a little bit of DIY you can easily build one yourself though.

Why use a temperature sensor?
First of all: safety. In case something goes wrong and your battery gets too hot, your charger will immediately stop charging. If you are charging NiMH batteries then the charger can also use ΔT charging method – a NiMH battery is deemed full if its temperature rises more than 1 degree per minute.
Actually the Ace 4500mAh NiMH battery that we own can not reliably be charged with the voltage sensing method (ΔV) method of our 4-button charger. It overcharges and gets dangerously hot. When I researched the issue I came across this forum post at rcgroups.com of how to use a temperature probe. Now our G.T. Hobbies X-Charger B606 is perfectly charging this particular battery without issues.
WARNING: This and other DIY projects are purely "at your own risk". If you are at all uncomfortable or inexperienced working with electronics, please reconsider doing the job yourself.
Building the temperature probe is easy
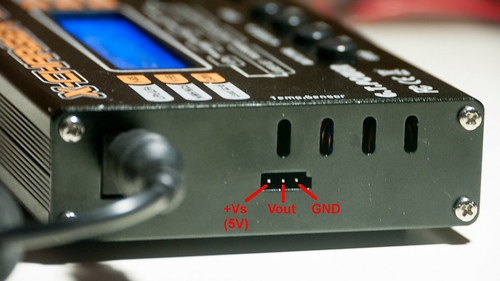
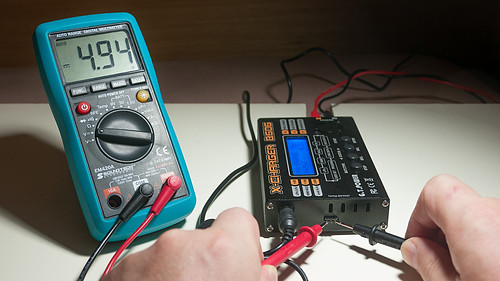
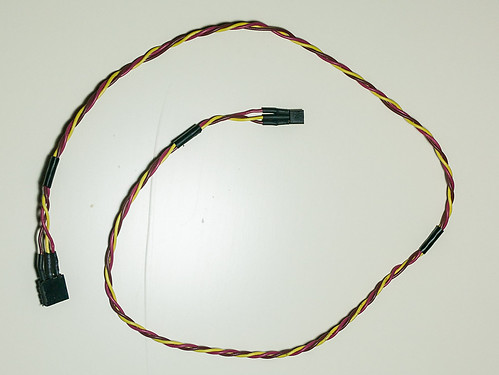
First, check that your charger has the right pin-out on the temperature sensor port. Verify with a multimeter that there is a voltage of 5V between the outer most pins of the connector, with Plus being on the left side and Minus on the right. Refer to the images for details.
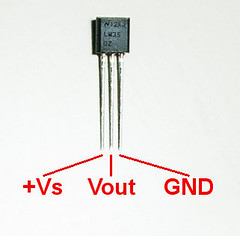
The main component is a LM35 temperature sensor. It comes in a variety of packages, the one suitable for RC chargers is the TO-92 package (typical transistor-style package). The LM35 is inexpensive and readily available in electronic stores. We got ours from a shop in Sim Lim Tower here in Singapore. There are different versions of the LM35: for RC charging the cheapest one does just fine.
To connect the sensor to the charger you will also need a thin, flexible, about 40cm long, color-coded 3-pole wire and a 3-pole connector with 2.5mm spacing. A wire and plug from an old servo or servo extension should work well too. You will also need 2mm heat-shrink tube to isolate and strenghten the leads.
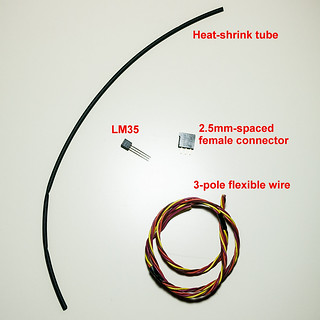
Solder the LM35 on the servo wire and isolate the bare leads with heat-shrink tube.
Using the temperature sensor
Ensure correct polarity of the connector when you plug it in! We attach the sensor to the battery using a rubber band. Ensure that the flat side of the LM35 is making good contact with the battery. On our charger you have to press the left-arrow button to cycle to the "Ext. Temp" display.
Wishing you and your batteries a long life!
You guys are really cool and nice for sharing this information I searched all over the Internet for so long trying to find out how do we get my temperature sensor to work finally so thank you very much PS I just found a flaw and it sucks if it says battery full as in it just finished charging and you accidentally switch polarity as you're pulling the cord off it will blow up the 555 timer circuit inside there I'm so bummed I just found out cuz I smell something burning inside there oh well you live and learn thanks again guys
ReplyDelete