Having finished our XR311, it is now time to get its brother, the Tamiya M1025 Hummer, back on the trail.
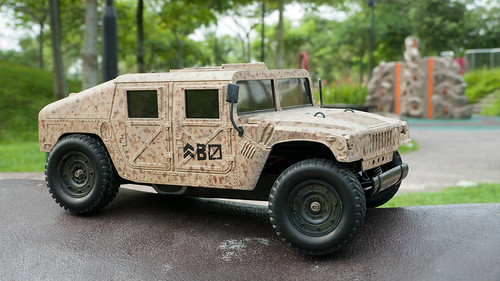
While the original paint job was very nicely done, LANE Boys Snr. is not a fan of camouflage and so the boys decided that this Hummer is going to be a white UN peace mission vehicle.
All the accessory parts like windows, roof hatch, light and air intake are screwed to the body, hence easy to remove.
The plastic parts were stripped with ordinary paint thinner, which worked surprisingly well. It was literally a matter of brushing the paint off. One can still see the decals that were applied to the car a long time ago.

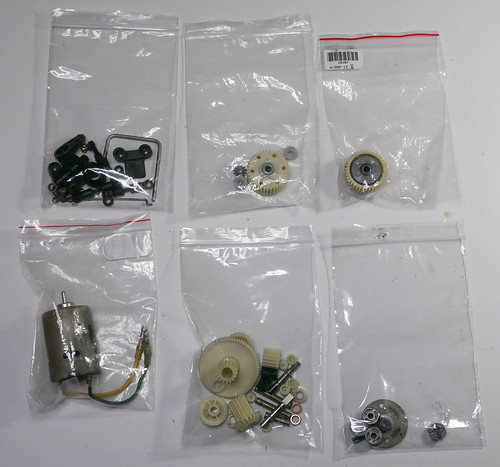
The gears are still in very good condition. The ball differential is also working perfectly. Everything has been cleaned and is ready for re-installation.
The motor is an original "Johnson" motor. We will replace it with a new Mabuchi RS540SH that we have from another Tamiya kit.
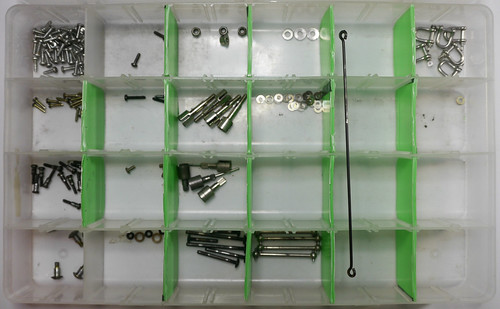
All metal hardware has been cleaned and sorted. We were able to polish rust away nicely.
There are only a small number of different hardware components: most chassis screws are 3 x 10 mm self tappers, all body screws 2.6 x 10 mm. That's basically it.
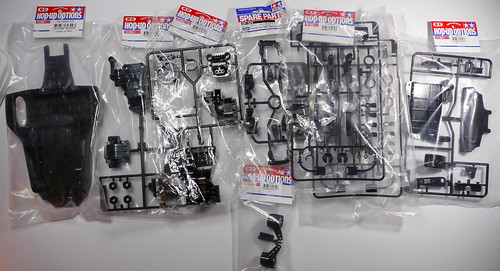
The plastic parts are in a very mixed condition.
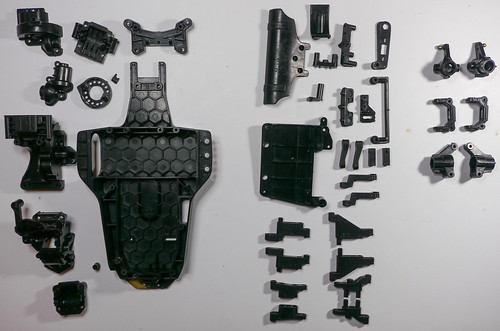
The parts on the left, which are the chassis, gear box housing, motor mount and shock towers (parts tree A and B) are in a sorry state. The plastic has hardened over the years in is extremely brittle. The parts literally break in your hands!
The hubs and carriers on the right (parts tree C) are also made from a hard plastic, but they are still strong and don't need replacement.
The parts in the middle are a soft and flexible plastic (parts tree D and E). They have survived well and will go back into the restored car.
We ordered a full set of sprues for the car anyway -- just in case.
More goodies: two pairs of shocks, new rims, a metal motor mount, and ball bearings (replacing plastic bushings).
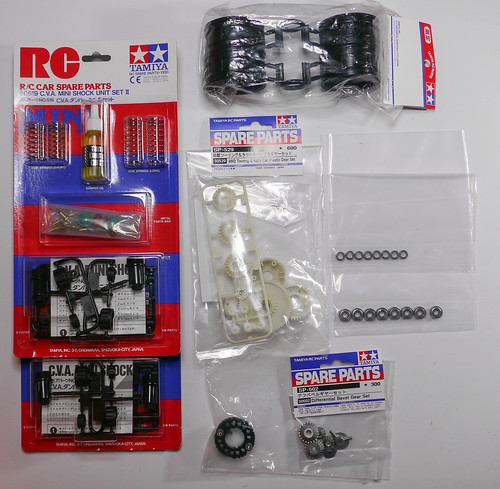
We also ordered a gear set as we will use a gear differential both in front and the rear and keep the fragile ball diff off the trails.
Stay tuned for further progress updates!
All articles in this series:
Our Tamiya M1025 Hummer
Part 1 - Dismantling and cleaning
Part 2 - Body work
Part 3 - Chassis
Part 4 - Detailing
No comments:
Post a Comment