With the body in good shape it was time to rebuild the chassis of our Tamiya M1025 Hummer. Like all Tamiya kits one begins with the differentials.

The original kit contained a ball differential for the back and a gear differential for the front wheel.
For better durability on the trail we replaced the rear diff with a locked gear differential and bought a second gear differential for the front.
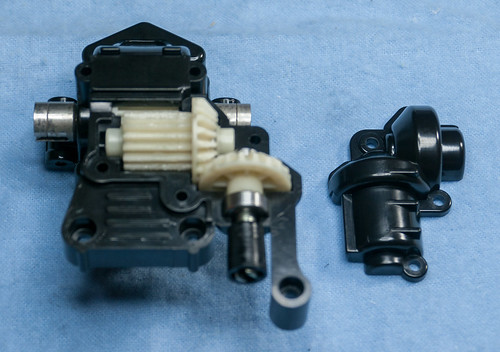
The following photo shows the ball differential (known as Manta Ray ball diff) on the left, and the (locked) gear diff on the right.
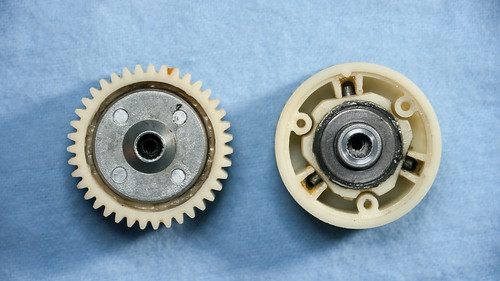
To lock the gear diff we used the locking plastic parts from a CC-01 gear set that we had spare. The inside gears are identical between the TA01 and the CC-01, but the outer gear is much larger on the CC-01.
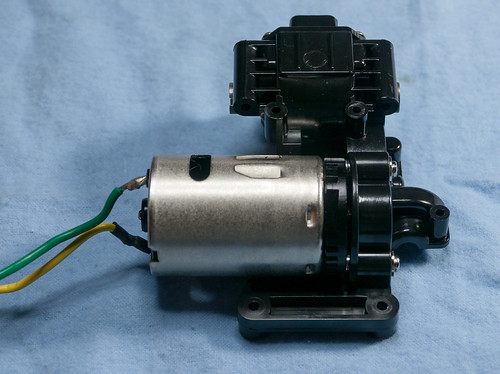
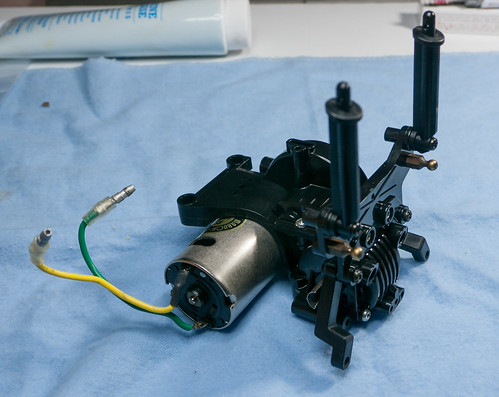
With the diffs built next was assembly of the rear gear box. The housing is new as the original was so brittle that it brakes apart upon touching.
We used a GPM Racing metal motor mount to hold the Mabuchi RS-540SH we salvaged from another Tamiya kit that we upgraded to brushless.
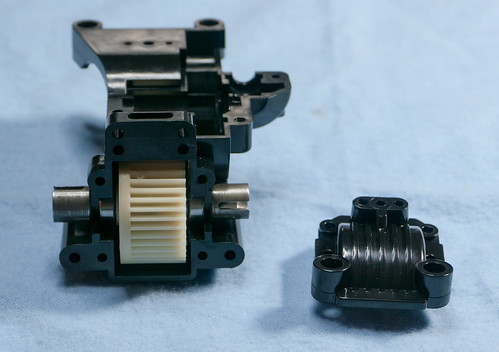
The large gear in the next photo is basically the spur gear, which also drives the bevel gear that brings power to the front axle. The smaller idler gear is identical front and rear.
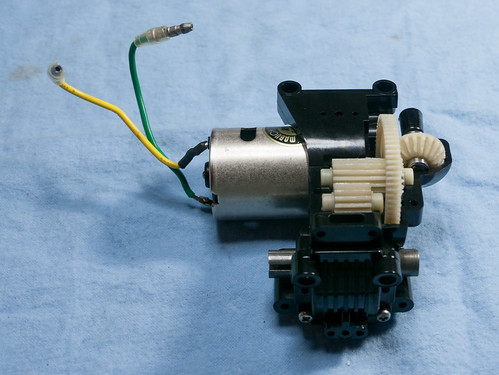
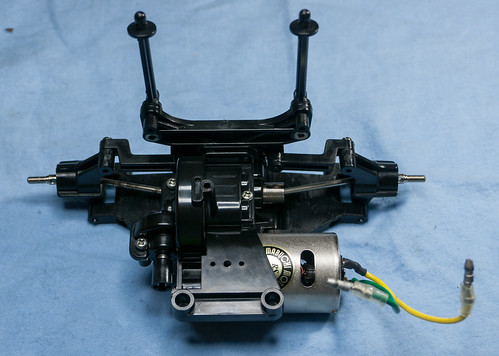
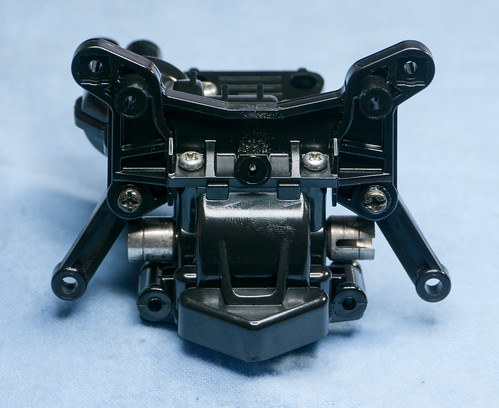
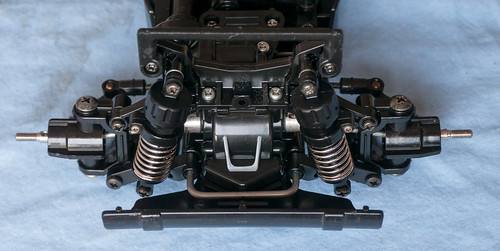
The rear gearbox has been closed up and the upper suspension arms have been mounted.
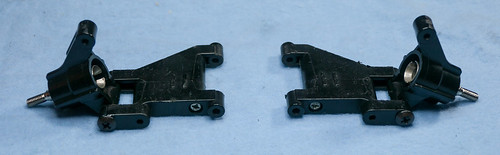
Next up is the rear suspension. All parts were re-used from the original car.
With the suspension attached to the gearbox it is ready to connect to the chassis.
The front gearbox is simpler than the rear. The new gear differential was installed.
Notice that the out-drives here in the front have a ring serving as identification marker, while the rear out-drives don't have this marker. The out-drives are different front and rear, so it is important to pay attention to this.
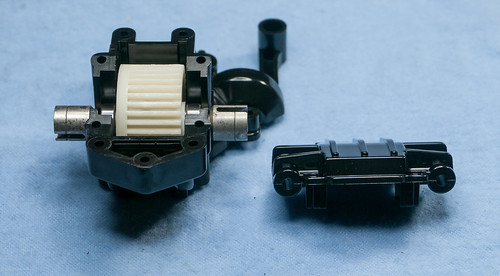
The idler and bevel gears are greased up and installed, ready to close the gearbox.
A new front shock tower has been installed together with the original suspension upper arms.
Like in the back we re-used all original parts of the suspension as they were in good condition. The only difference is that we upgraded the plastic bushings to ball bearings throughout the vehicle.

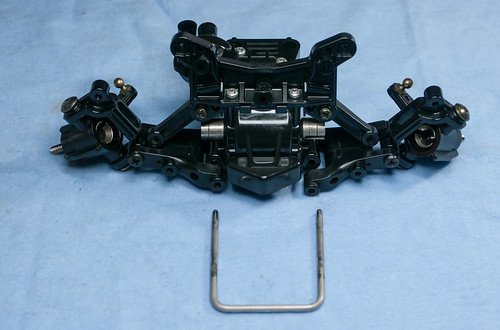
In contrast to the rest of the suspension, the front lower arms are mounted with this U-shaped metal rod instead of special pin-screws.
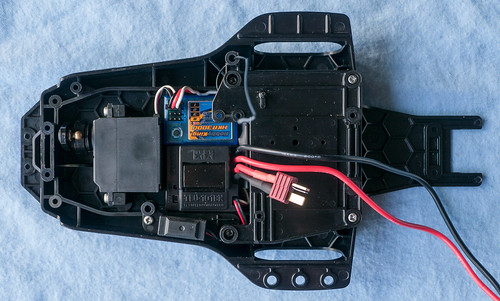
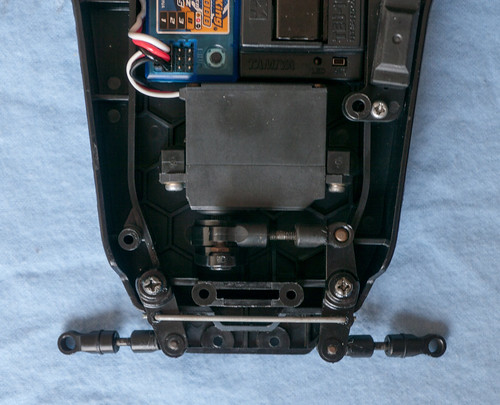
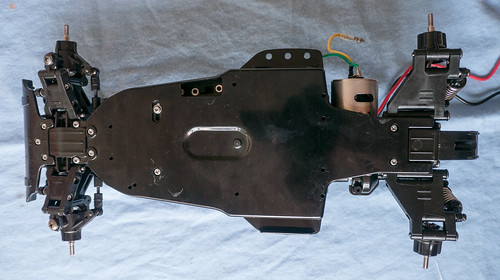
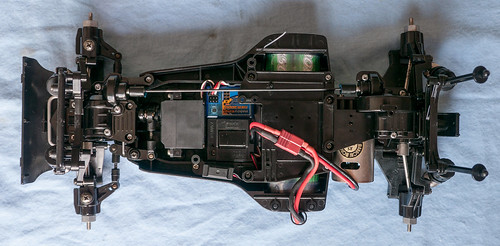
With both axles being assembled the brand new chassis got the electronics installed.
We had an original Tamiya Servo TSU-03 lying around, perfect for this car. The ESC is an old TEU-101BK that had shoddy wiring, which got replaced. Since the TEU-101BK does not have a BEC I added a UBEC between the ESC/Receiver and battery compartment.
All wires were trimmed to the correct size to keep it compact and neat.
Next up is the steering assembly. It is a simple bell crank with a metal bar between the pivots. The pivots hinge on simple step screws.
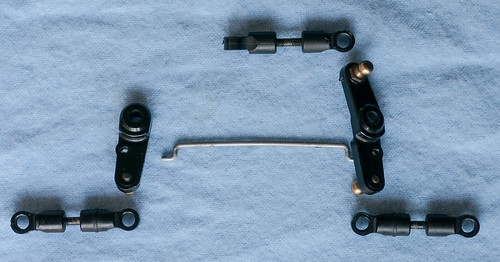
The steering is very compact and low as the chassis has buggy origins.
The rear axle and gearbox gets bolted onto the chassis with four screws.
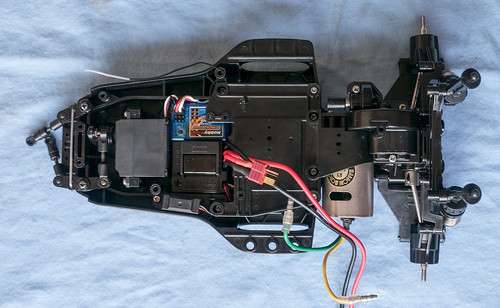
The front gearbox bolts on in a similar fashion but has an one more screw holding it to the chassis. Note the thin drive shaft towards the front.
The horizontal bar above the shock tower is the front body mount. The body has two hooks that go under that bar. The front bumper captures the U-shaped suspension hinge pin.
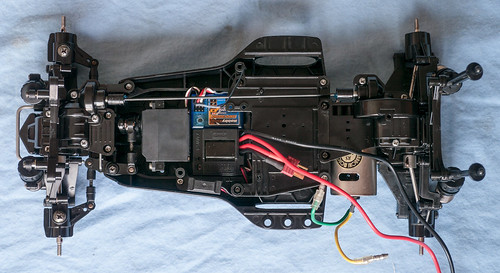
Bottom view of the completed chassis. The last thing to do is soldering the motor wires.
The completed chassis with battery installed. Looks like new, smells like new, drives like new.
I am really pleased how it turned out. A test drive at home showed that it runs very smooth and quiet.
The chassis was extremely easy to build compared to other Tamiya kits like the DB-01 or M-06. Almost all screws on the chassis are 3 x 10 mm self tapping screws, unlike more modern kit that use a large diversity of machine screws and self tapping screws.
Now only the detailing and finishing touches are left.
All articles in this series:
Our Tamiya M1025 Hummer
Part 1 - Dismantling and cleaning
Part 2 - Body work
Part 3 - Chassis
Part 4 - Detailing
Hi,
ReplyDeletehere are some links to the parts from my favorite vendors:
http://banzaihobby.com/radio-control/hop-up-spare-parts-for-tamiya/tgx/tamiya-rc-diff.-bevel-gear-set
http://banzaihobby.com/radio-control/hop-up-spare-parts-for-tamiya/ta-01-ta-02-ta-03/tamiya-rc-4wd-car-plastic-gear-set
http://www.stellamodels.com.hk/50602-differential-bevel-gear-ta03-ta04-p-4841.html
http://www.stellamodels.com.hk/50529-touring-rally-plastic-gear-p-4517.html
http://www.rcmart.com/tamiya-50602-differential-bevel-gear-p-23741.html?cPath=595_744_376
http://www.rcmart.com/tamiya-50529-touring-rally-plastic-gear-ta02-chassis-p-23261.html?cPath=595_744_754
Thanks for following up with the parts list. Appreciate the detailed build pictures as well, since I just bought a pre-assembled kit. I'm assuming it's been a decade y'all no longer have (kids) nor this kit?
ReplyDelete