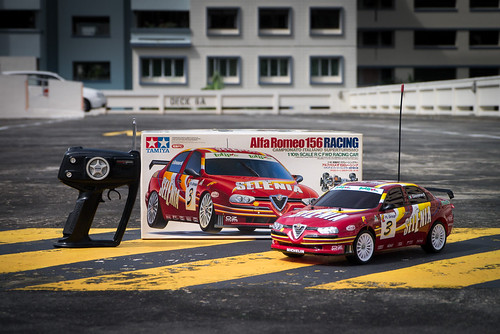
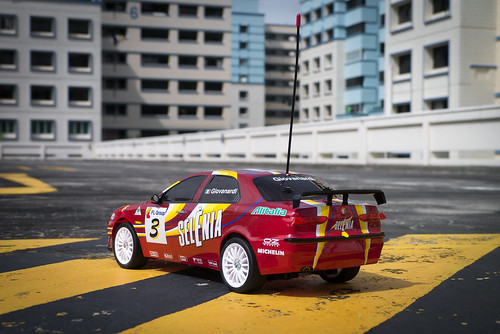
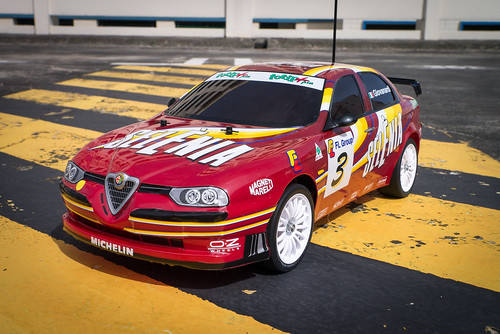
A few weeks ago we bought a cheap second hand TT-01 because LANE Boys Snr. wanted to have a 10th scale touring car for relaxing in the local park. Along with the TT-01 came another box: A semi-vintage FF02 Alfa Romeo 156. The body shell had been used quite a bit and was heavily damaged. The chassis was incomplete, but in excellent condition. The front uprights were stripped where the king pin screws go in; turn buckles, servo mounts and a drive shaft were missing, but the rest of the vehicle looked like the car was never run before.
So we've set out to rebuild the car to its former glory.
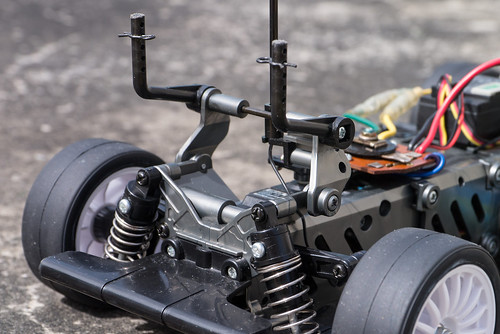
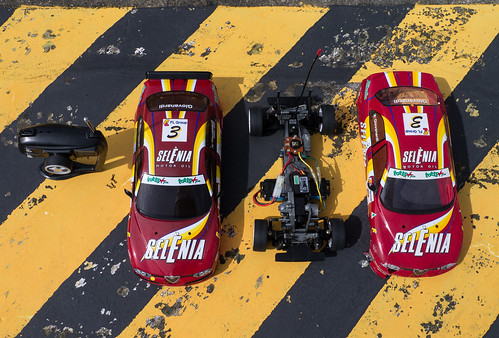
According to what we could find on the Internet, the FF02 chassis was not very popular. The chassis is not a stand-alone design, but the frame and gears come straight from the M-03 and the suspension and other parts are reused from the TL-01. There are only a few pieces that are FF02 specific: the extension piece that makes the wheelbase 257 mm, and the rear body mount support.
The rear body mount support is one of the few FF02-specific pieces.
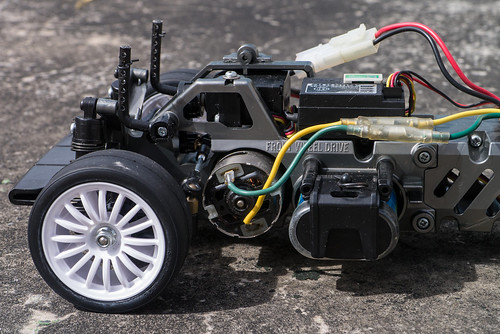
Being based on two very popular Tamiya chassis means that it is still easy to find parts for the car in the various Tamiya specialist online shops. And the plastic sprues are very cheap too. Along the way we replaced the bushings with ball bearings.

The FF02-specific chassis extension between the receiver and the MSC converts the M-03 -based chassis to the standard 257 mm wheelbase.
The build of the chassis couldn't be any simpler. Almost all screws are 3 x 10 mm self tappers. Moving parts are fastened with 3 x 14 step screws, and the arms are held with screw pins. If you are looking for a first kit to build for your child, those semi-vintage Tamiya kits like the M-03, TL-01 or this FF02 are certainly worth a look.
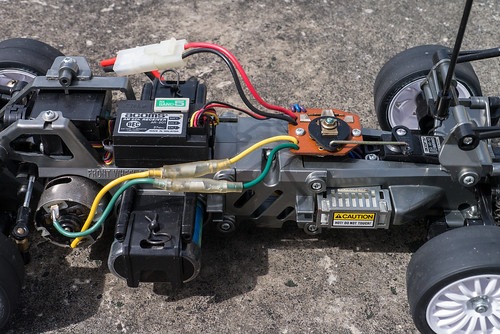
The car came with the original 3-speed Manual Speed Controller (MSC) but was missing the connection rod to the servo. We got a brand new MSC off eBay, which turned out cheaper than if we would have bought the Z-bend tool to make our own rod. And now we have a brand new spare MSC, along with a new tube of the special switch grease that is needed to maintain it.
The resistor of the speed controller has a special mounting place in the side of the chassis. Very tidy!
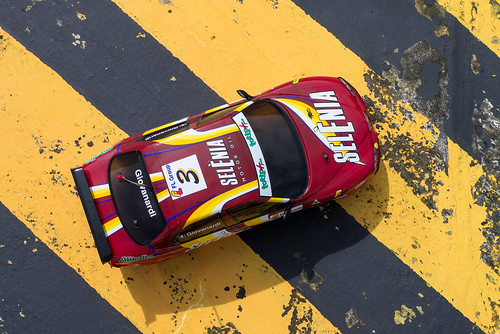
The Alfa Romeo 156 body is no longer produced. There are a few appearing on eBay, but the sellers ask a lot of money for them. Our local Tamiya dealer in Singapore however had two body sets still in stock, for the normal price one pays for a shell here in Singapore.
Being old stock means that the glue of the stickers is not very strong anymore. If anyone has a tip of what type of glue to use to re-glue stickers that are pealing off please let us know!
Staying true to the vintage, we are using an Acoms 27 MHz radio set, proudly made in Malaysia, that we received with our Hummer. It came with two servos and is in excellent working condition.
When you are used to driving modern RC cars, the experience of driving such an old chassis with a mechanical speed controller is quite a treat. One needs to adapt the driving style as there is no fine control of power. Using the MSC also means that you give up brakes, which in turn forces you to a smooth driving style through corners, and having the motor pull you out.
The car tracks well and the front wheel drive pulls it nicely through corners and chicanes. But take the throttle off while the car is turning and it immediately swings the back around.
All in all, a fun addition to our ever-growing garage!
PS: the car seems to have come with a dangerous virus, because shortly after LANE Boys Snr. had to purchase a TL-01 kit new in box... Watch out!
hope this can be help althot this post is 1 year ago sharing experience
ReplyDelete1. for full color no transparent decal, use thin double sided tape, paste on the stick part of the decals and trimmed then paste on shell use a bit of heat blower will form better.
2. transparent decals use 3M spray adhesive spray on the sticky side n let dry for ard 8-10 min n u will have a sticky transparent residue for u to paste the decal and this is no permanent like super glue.
3. never try but got this from a scale builder, use a vvinyl decals finishing solution and apply it around the sticker on the shell, this will make the decals seem like printed on the shell....no personal experience as i too scare to mess this up
looking forward to ur update....make a led control box with sound ....so when apply throttle can hear loud loud engine noise ahah
good luck
Awesome info, thanks a lot! Will try the double sided tape and spray adhesive tips!
DeleteI tried decal finishing solution that the scale builders use but they do not work on the thick RC car decals, only on the super thin decals that come with the scale models.
Regarding engine sound: actually I have built my own engine sound simulator for RC cars. It is not 100% finished yet but I will post instructions of how to build one soon! Even with WiFi control :)